Good landscape lighting is less about fixtures and more about vocabulary. Designers combine a small set of techniques, each with a specific job, to give a property depth, calm and a sense of order after dark. Learn the twelve below and you will start to see why some homes look finished at night and others just look lit.
Lighting from below
Ground-level fixtures aimed upward are the backbone of most residential designs. They reveal height and texture, but they are also the easiest to overdo.
1. Uplighting
What it is: A fixture at the base of a tree, column or wall aimed upward. Where it works: Trees, tall shrubs, columns and the vertical lines of a facade. Fixture tips: Use a narrow beam (around 15 to 25 degrees) for tall, slender subjects and a wider beam (35 to 60 degrees) for broad canopies. Shroud the lens so the source is hidden from the street. Common mistake: Placing the fixture right against the trunk so only the bark glows and the canopy stays dark. Our tree uplighting guide covers placement in detail.
2. Grazing
What it is: A fixture placed very close to a textured surface, typically 6 to 12 inches out, so light skims across it. Where it works: Austin stone, ledgestone, rough brick, rough-sawn cedar and textured tree bark. Fixture tips: A narrow to medium beam aimed nearly parallel to the surface. Common mistake: Grazing smooth stucco or painted siding, which reveals every wave and patch rather than texture.
3. Washing
What it is: A wide, even spread of light across a surface from a few feet back. Where it works: Smooth walls, stucco, painted brick and long garden walls. Fixture tips: Wide flood beams (60 degrees or more) set 2 to 4 feet from the wall, overlapping slightly so there are no dark stripes. Common mistake: Washing an entire facade evenly, which flattens the architecture. Wash selected planes and let others fall into shadow.
Lighting from above
Light from overhead feels natural because it echoes the moon and sun. It is also excellent for function, since it lights the ground without glare.
4. Downlighting
What it is: Fixtures mounted on eaves, pergolas, walls or trees aimed downward. Where it works: Patios, outdoor kitchens, driveways and planting beds. Fixture tips: Mount high enough to spread the light and use glare-control louvers or deep shrouds. Common mistake: Using a bright floodlight that blinds anyone looking up. Downlighting should feel ambient, not like a security light.
5. Moonlighting
What it is: Downlights mounted high in a mature tree, often 20 to 35 feet up, so light filters through the branches and casts dappled shadows on the ground. Where it works: Large live oaks and other spreading canopies over lawns, patios and drives. Fixture tips: Use low output, wide beams and several fixtures spread through the canopy. Mount with stainless hardware and leave slack for growth. Common mistake: One bright fixture instead of several soft ones, which creates a hot spot rather than moonlight.
Shadow and contrast
These techniques use darkness as deliberately as light. They are where a design starts to feel artful.
6. Silhouetting
What it is: Lighting a wall or surface behind a plant or object so the object reads as a dark shape against a bright background. Where it works: Sculptural plants such as agave, yucca, Japanese maple or a sago palm in front of a light-colored wall. Fixture tips: Hide a wash light behind the subject, aimed at the wall. Common mistake: Lighting the subject from the front as well, which cancels the silhouette.
7. Shadowing
What it is: Lighting a subject from the front so its shadow is projected onto a wall behind it. Where it works: Open-branched trees and ornamental grasses near a plain wall. Fixture tips: Wide beam, set low and a few feet in front of the subject. Moving the fixture closer makes the shadow larger and softer. Common mistake: Choosing a dense shrub, which casts a solid blob rather than a pattern.
Focus and emphasis
8. Spotlighting (accent lighting)
What it is: A narrow beam that picks out a single feature. Where it works: Statues, fountains, address plaques, specimen plants and focal points at the end of a view. Fixture tips: Narrow beam, low wattage, aimed from out of the line of sight. Common mistake: Spotlighting too many things. If everything is a focal point, nothing is.
9. Cross-lighting
What it is: Two or more fixtures lighting a subject from different angles. Where it works: Large trees seen from several directions, statues and entry features. Fixture tips: Place fixtures at roughly 90 to 120 degrees apart and vary their intensity slightly so the subject keeps some modeling. Common mistake: Equal intensity from both sides, which erases depth.
The goal is not to light everything. It is to decide what deserves attention and let the rest rest.
Movement and safety
Functional lighting should still be designed. It is often the first thing guests see.
10. Path lighting
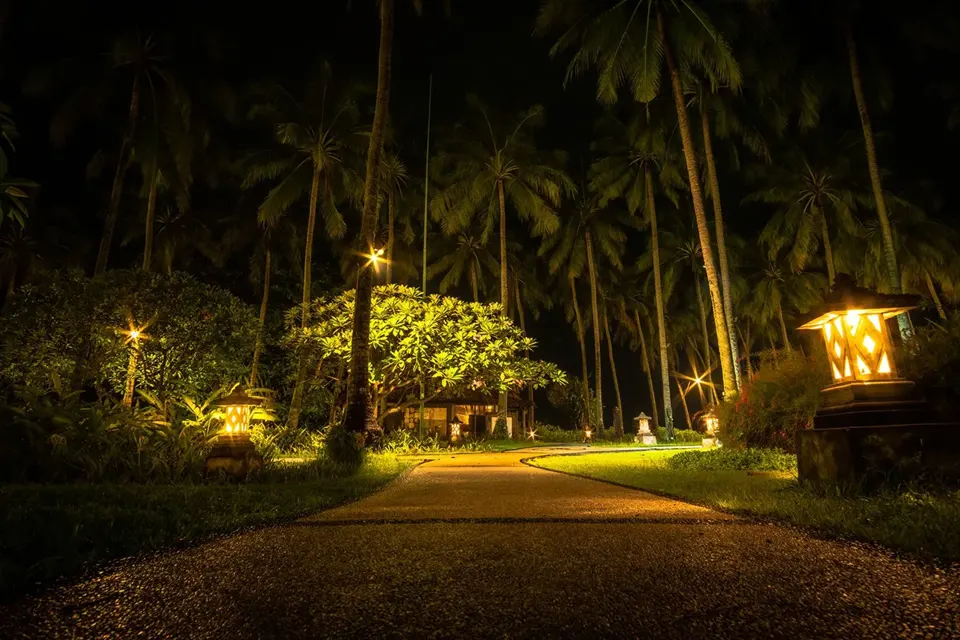
What it is: Low fixtures that cast pools of light on walkways. Where it works: Front walks, garden paths and side yards. Fixture tips: Hat-style fixtures that throw light down, spaced roughly 6 to 10 feet apart and staggered. Common mistake: Lining both edges in straight rows, the "runway" look. See our path light spacing guide and pathway and driveway lighting service.
11. Step and hardscape lighting
What it is: Small fixtures recessed into risers, walls or under cap stones. Where it works: Steps, seat walls, retaining walls and outdoor kitchen counters. Fixture tips: Low output with a downward or louvered face. Under-cap fixtures graze the wall face beautifully. Common mistake: Bright, exposed sources at eye level when seated.
Water features
12. Underwater and water feature lighting
What it is: Submersible fixtures in ponds, fountains and spillways, plus lights aimed at falling water from the edge. Where it works: Fountains, spillways, koi ponds and pool water features. Fixture tips: Use fixtures rated for submersion and place them under the point where water falls so the moving water catches the light. Keep them clean, since algae dims them quickly in Texas heat. Common mistake: Lighting still, murky water, which looks dark and dull. Our patio and pool lighting work often pairs water lighting with soft downlighting nearby.
Choosing the right technique
| Subject | Primary technique | Good partner |
|---|---|---|
| Live oak | Uplighting or cross-lighting | Moonlighting |
| Stone or textured brick facade | Grazing | Washing on smooth planes |
| Stucco wall | Washing | Silhouetting |
| Front walk | Path lighting | Moonlighting from above |
| Patio | Downlighting | Step and seat wall lighting |
| Sculpture or specimen plant | Spotlighting | Shadowing |
| Fountain | Underwater lighting | Soft accent on surrounding plants |
Layering it together
A finished design typically uses three or four techniques, not all twelve. A common Spring front yard might combine grazing on a stone entry, uplighting on two oaks, a few staggered path lights and moonlighting over the drive. Those layers create depth: a foreground, a middle ground and a background, with darkness between them.
At Spring Landscape Lighting we sketch these layers on site before choosing fixtures, so each technique has a reason to be there. If you want to experiment first, try our lighting visualizer, or browse finished examples on the inspiration page.
Frequently asked questions
What is the difference between uplighting and moonlighting?
Uplighting places fixtures at ground level aimed up into a tree or at a wall. Moonlighting mounts fixtures high in a tree aimed down, so light filters through the branches and casts soft, dappled shadows on the ground.
When should I use grazing instead of washing?
Use grazing on rough, textured surfaces such as stone or rustic brick, where light skimming across the face brings out depth. Use washing on smooth surfaces such as stucco, where grazing would exaggerate imperfections.
How many lighting techniques should one yard use?
Most well-designed properties use three or four techniques. Using every technique at once usually looks busy. Choose the ones that suit your architecture and plantings and leave some areas dark for contrast.
What is cross-lighting?
Cross-lighting uses two or more fixtures aimed at a subject from different angles, often 90 to 120 degrees apart. It is especially useful for large trees and statues that are seen from more than one direction.
Do I need special fixtures for fountains and ponds?
Yes. Underwater fixtures must be rated for submersion. They also need regular cleaning, since algae and mineral buildup can dim them quickly in warm weather.

Spring Landscape Lighting
Landscape lighting designers serving Spring, Klein, The Woodlands and North Houston. Questions about your property? Get in touch.